Fish Finders 101: How to Use Them to Catch More Fish
Choosing the best fish finders and learning how to use them properly to help catch more, bigger fish
There’s no doubt that one of the very best fishing tools aboard your boat is the fish finder. But which are the best fish finders to use? And how can everyone from casual anglers to experts most effectively harness that tech to catch more fish?
What Kind of Fish Finder Do You Need?
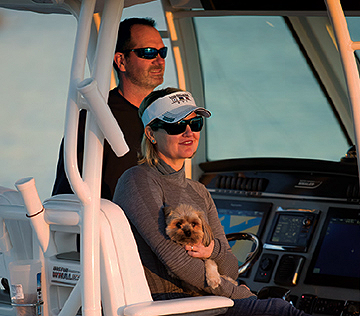
If you’ve got a new Boston Whaler fishing boat, chances are it comes with a top-of-the-line Lowrance fish finder. These units are packed with features like traditional sonar, down-scan, side-scan, and even 3D imaging. But what you really need depends on the kind of fishing you’re doing.
Traditional Sonar: The Workhorse
This type of sonar looks straight down and is great for covering a lot of depth. Many offshore anglers rely on it because it can reach deep—sometimes 1,000 feet or more. CHIRP sonar versions go even deeper and give clearer readings.
Best for: Offshore fishing or a mix of inshore/offshore.
Down-Scan: Clearer Detail at Shallower Depths
Down-scan sonar gives you a sharper image of what’s under your boat. You’ll see more detail—like structure and bait—but the trade-off is that it doesn’t reach as far down. Some models max out around a few hundred feet, others much less.
Best for: Lakes, rivers, and inshore waters where depth isn’t extreme.
Side-Scan: Wide Coverage, Less Depth
Side-scan sonar shows you what’s out to the left and right of your boat. This is really helpful when you’re trying to cover more ground or find fish hiding around structure.
The downside? Like down-scan, it doesn’t work great at deep depths. Also, if you’re using one screen for everything, side-scan can eat up a lot of screen space. A bigger display—or a second one—can make a big difference.
Best for: Inshore and freshwater anglers covering wide areas.
3D Imaging: A Full Picture of the Bottom
3D sonar combines down- and side-scan data to build a visual model of the bottom. You can move the view around and really understand what you're looking at. It won’t add range, but it does help you see structure more clearly.
Best for: Anglers who fish complex structure or want a better visual understanding of the bottom.
Tips for Getting the Most Out of Your Fish Finder
Even the best fish finder won’t help much if you don’t know how to use it. Most people only scratch the surface of what these devices can do. Here’s how to get more out of yours:
- Get it installed right. Most issues with fish finders come from poor installation—especially with the transducer. Let a pro handle it.
- Use Auto mode at first. Today’s units are smart. Leave things like sensitivity and range on auto until you’re more familiar with how it works.
- Zoom in when needed. If you’re targeting bottom fish or structure, use the zoom feature. It gives you a clearer view of what’s really happening down there.
- Watch for thermoclines. These are temperature layers where fish like to hang out. On your screen, they show up as faint, horizontal lines at a steady depth. If you spot one, keep an eye on it.
Bigger Screens Make a Big Difference
The more you try to cram onto one display, the harder it is to read. If you’re using split-screen views for sonar, maps, and other features, a larger screen—or an extra one—will help you see everything clearly.
Bottom Line
Fish finders aren’t just for pros—they’re for anyone who wants to make the most of their time on the water. The more you use yours, the more you’ll learn. Start simple, keep it practical, and get hands-on experience. The results will speak for themselves.
Read more about the advanced technology and industry-leading innovation behind each Boston Whaler boat.
This is for general information purposes only. Your use or reliance on any of the information in this Blog is solely at your own risk. Under no circumstance will we have any liability for any loss or damage of any kind incurred as a result of the use of any of the information provided.
Options and features mentioned subject to change. Please confirm availability of all accessories and equipment with an authorized Boston Whaler Dealer.


